Make sure to look over the safety precautions before beginning to build the computer.
1. Open the case

Carefully open the case by removing the side panels. Use a screwdriver of the appropriate size to remove the screws. Then slide the panels back and lift it up to remove if from the case.
WARNING: The edges along the case can be very sharp and cause serious bodily injuries
2. Ground Yourself

Remove any static charges that have or will build up on you as you assemble the PC. The best way to do this is using a wrist strap that is connected to the CPU case. Not grounding yourself could cause a buildup of static electricity in your body which will damage equipment if come in contact with.
3. Mount the Motherboard

Carefully take your motherboard and line it up with the I/O shield (a metal plate that protects the ports at the back of the motherboard). Next, you should see holes in both the motherboard and the case where screws should be placed to install the motherboard onto the case. Then, screw the motherboard onto the case using a screwdriver of the appropriate size.
Note: Using the incorrect tool to perform a specific task can damage the equipment
4. Install the Processor (CPU)
The Processor is the more fragile of the different CPU components. Carefully remove it from the box and find a gold arrow located on one of the corners of the processor. A similar golden arrow should be on the motherboard’s processor socket. After findings these, line the arrows up to determine the direction the processor will go into the socket. Next, lift up the lever and gently place the processor into the socket. Then, pull down the lever to secure the processor in place. If force is necessary to press the processor into the socket, you might have the direction of the processor inverted.
Note: Make sure that the processor you purchased and the processor socket of your motherboard are identical. Else, there may be difficulty inserting the processor into the socket.
Install the CPU Cooler (Heatsink)
After your processor has been successfully installed onto your motherboard, take some thermal paste (if not already applied on to the CPU) and gently squeeze a pea-sized amount on top of the processor. Then take your cooler and gently place it on top of your processor. There will be two latches on the side of the cooler which you can hook onto the motherboard to safely secure the fan.
Note: Do not overuse the thermal paste and avoid spreading it out by yourself. When putting the heat sink onto your processor, the pressure should spread out the paste for you.
5. Install the RAM

This step is fairly easy compared to the previous ones. Carefully take the RAM and gently insert it into the RAM sockets. Then pull down the slips on the side to secure your RAM in place. Little force is required for inserting the RAM into the sockets, so if you need a lot of strength to push the RAm into the sockets, chances are that the RAM is not placed correctly.
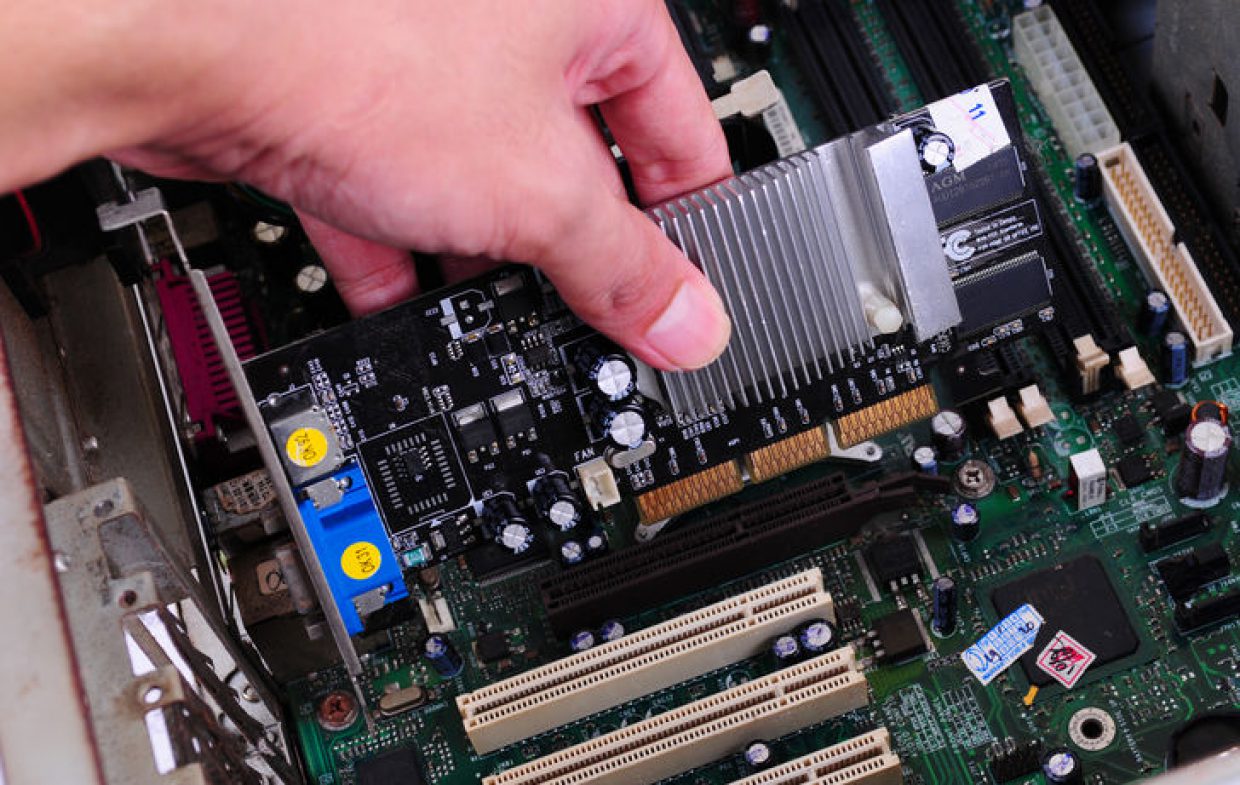
6. Install PCI Cards
 To install the PCI onto the motherboard, you must first locate PCI slots. Make note that there are several slots. Next, find the uppermost slot that matches your card and slide the bracket into place. Then gently push down on it to secure it in place. Screw the brackets onto the motherboard.
Removal: If for some reason you want to remove the PCI cards, there is a lever located at the back of the socket that you can press and take out.
7. Install your Hard Drive
Find a bay in the case where you hard drive will be mounted. Make sure it is located in a place where wires can flow through easily to  connect with the hard drive. Carefully slide the drive into the slot and screw it into the case.
8. Install the Optical Drive

In the case, you will find the drive bay where you will mount the optical drive. Slide the optical drive into the bay and line it up the with screw holes and also make sure the front of the drive is facing towards the front of the case. Then gently screw in the screws. You must also ensure that wires are accessible to the drive.
9. Install the Case Fan

The case fan is usually located at the back of the case. These should be a specific place where the fan should be mounted. Once you determine where the fan is to be placed, carefully mount it onto the case. Make sure it is positioned so that air is blown out of the case.
10. Install the Power Supply

Knowing where to install the power supply should be fairly simple as there is a large rectangular hole in the case that fits the power supply. After placing the power supply into the hole, you should be able to see the screw holes of the power supply line up with the holes of the case. Next, screw in the the power supply onto the case.
11. Plug in all the wires/cables

The last step to assembling your PC is plugging everything in. Every component installed onto the motherboard requires power to operate. The motherboard has a 24-pin (long plug) and a 4-pin motherboard cable that gives power to the motherboard. Push in these 2 cables into the power slots until you hear a click. Some video cards require a 6-pin PCI cable. If there is not socket for the cable, just leave it be.
Molex power cables are connected to the case fan to give the fan its power. Molex cables are long and white.

The hard drive and optical drive require SATA power and Data cables which contains 2 cables; a skinny black plug that supplies power and a small red cable that transfer data between the hard and other things.
Audio, USB, and firewire connectors have labeled cables coming from the case that correspond with sockets on the motherboard. Note that the firewire cable is labeled 1394.
Finally, there should be 3 cables labeled HDD LED, POWER SW, and RESET SW which are the LED and power connectors. These cables connect the case to the motherboard so that you can turn on your computer. These cables have one/two pin cables that connect to an 8-pin socket on the motherboard.
12. Turn on your PC
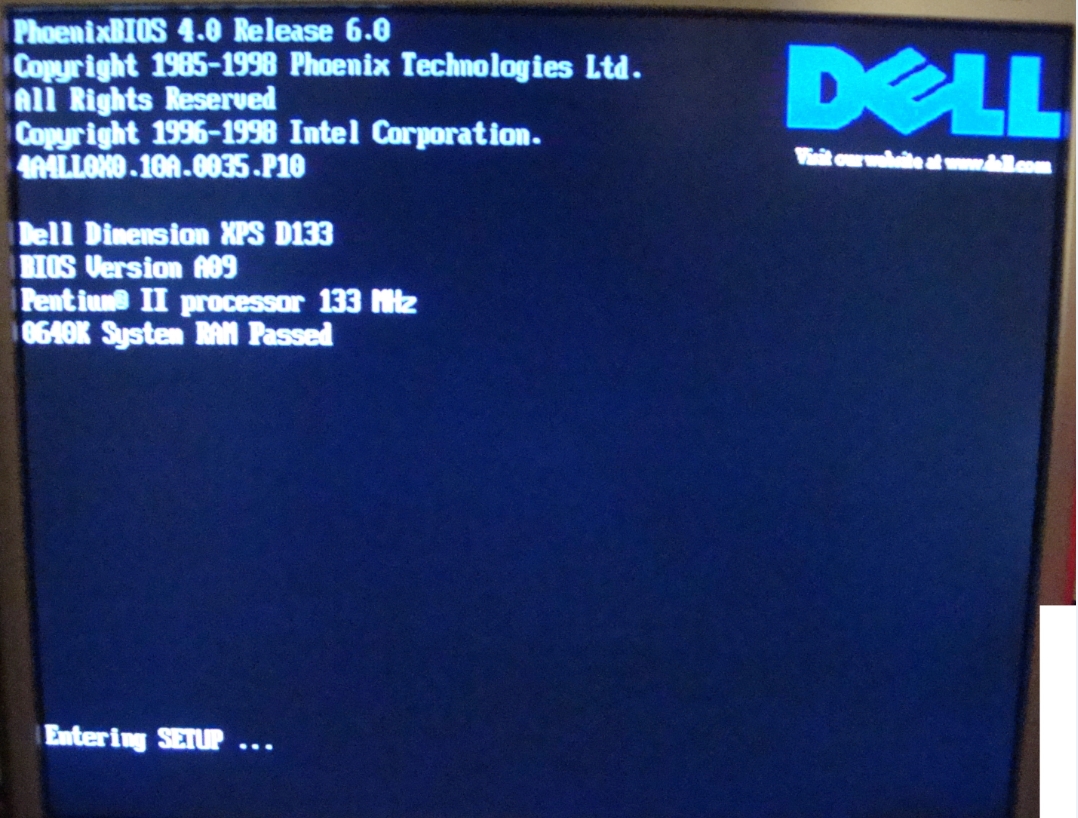
Plug the power cable into a wall socket, flip the power switch on, and press the power button located in front of the case. If the PC was assembled successfully, the monitor (plugged into the video card or motherboard if you don’t have a video card) should display a POST screen. Clicking “delete” will lead you to the BIOS setup.
How to assemble a computer:
Assembly Video Link (click here)
